Right away Oracle jdeveloper 11g doesn't have compatibility with SOA.In order to develop SOA application trough jdeveloper we need to install the SOA extension to jdeveloper
We can do this in two different ways
1)Offline download
2)Online Update
In offline download we will download the SOA extension file in to our local machine and install it in jdeveloper.
In online update we will directly update SOA plugin through "Search Update Center" in HELP menu
Following are the steps to install SOA extension in jdeveloper by offline method:
1) First download the SOA extension file(Zip file) from Oracle Update Center to your local machine.
http://www.oracle.com/ocom/groups/public/@otn/documents/webcontent/156082.xml
File will be saved as soa-jdev-extension.zip.
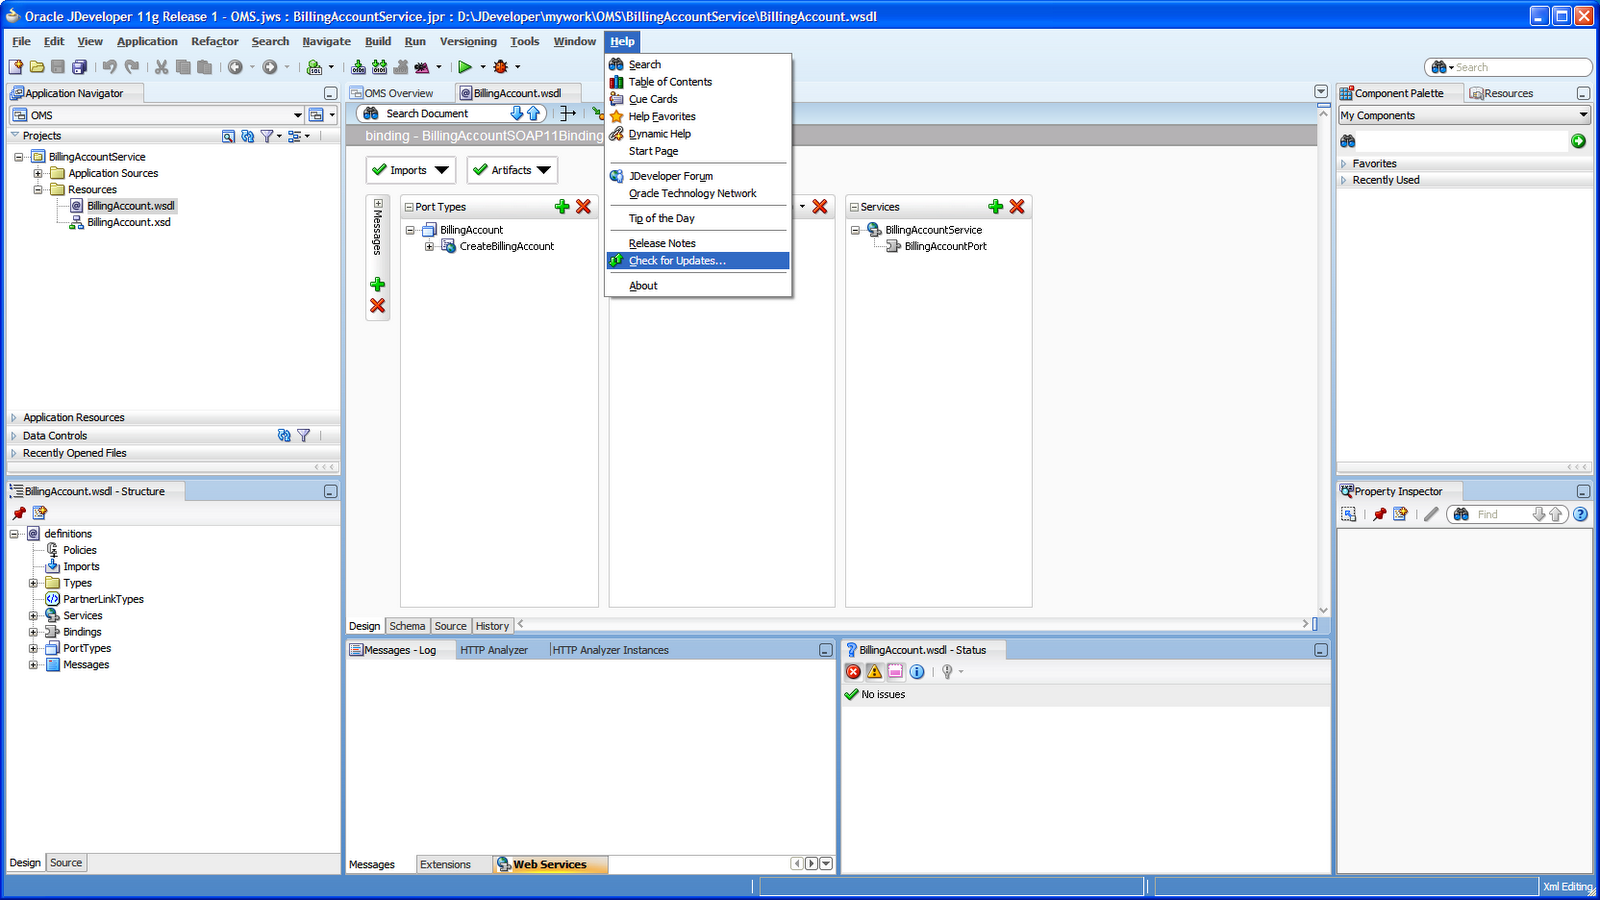
2) After successful download start jdeveloper and select Help/Check for updates in Menu
3)Click Next
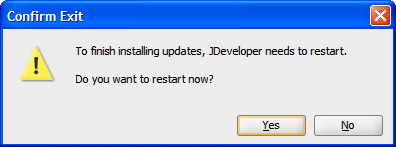
6) jDeveloper will pop up the window to
prompt the restart is needed to finish the installation. Click on Yes
button to restart jDeveloper
After the restart of JDeveloper Oracle JDeveloper SOA extention is installed.Now you can start developing SOA application in jdeveloper.
Following are the steps to install SOA extension in jdeveloper by online method:
1) Open your Jdeveloper 11g and Click on Help menu and select “Check for Updates”
2)Click next
3) Under ‘Search Update Centers‘, select “Oracle Fusion Middleware Products” and “OfficialOracle Extensions and Updates” options as shown below & Click Next
4) You will view all the available Extensions and Updates in the wizard as shown below
5)Search for SOA from the available list as shown below and Select the “Oracle SOA Composite Editor 11.1.1.3.0.25.57” and click Next.
Now the extension will get downloaded and installed in to your Jdeveloper 11g. You can see the progress bar as shown below
7) Once the extension is installed click “Finish“.
We can do this in two different ways
1)Offline download
2)Online Update
In offline download we will download the SOA extension file in to our local machine and install it in jdeveloper.
In online update we will directly update SOA plugin through "Search Update Center" in HELP menu
Following are the steps to install SOA extension in jdeveloper by offline method:
1) First download the SOA extension file(Zip file) from Oracle Update Center to your local machine.
http://www.oracle.com/ocom/groups/public/@otn/documents/webcontent/156082.xml
File will be saved as soa-jdev-extension.zip.
2) After successful download start jdeveloper and select Help/Check for updates in Menu
3)Click Next
4) Now select Install From Local File and browse the downloaded extension file and click next
5) Next window will show the summary of the installation.
Click next.
After the restart of JDeveloper Oracle JDeveloper SOA extention is installed.Now you can start developing SOA application in jdeveloper.
Following are the steps to install SOA extension in jdeveloper by online method:
1) Open your Jdeveloper 11g and Click on Help menu and select “Check for Updates”
2)Click next
3) Under ‘Search Update Centers‘, select “Oracle Fusion Middleware Products” and “OfficialOracle Extensions and Updates” options as shown below & Click Next
4) You will view all the available Extensions and Updates in the wizard as shown below
5)Search for SOA from the available list as shown below and Select the “Oracle SOA Composite Editor 11.1.1.3.0.25.57” and click Next.
Now the extension will get downloaded and installed in to your Jdeveloper 11g. You can see the progress bar as shown below
7) Once the extension is installed click “Finish“.


